Thursday, 21 August 2008

Wedding Thank-You Cards

So I did it!  I made about 100 thank-you cards within the first two months after our wedding!

A while back I lucked out and found these super cute square folded cards from IKEA.  They're made from recycled brown fibber card stock with black printing in a striped motif and a damask.


To embellish I tore white and green paper and layered them over the bottom half of the card.  I added thin teal ribbon with a black paper punch.  My Critter Cutter worked very hard to cut out 100 ''thanks'' out of silver paper.


The teal ribbon from the front I wrapped around and tucked under the photo which would be held in place with silver photo corners.  My favourite stamp in my collection in the ''Happily ever after'' which I stamped under the picture.  Than I stamped ''thanks so much'' in the bottom portion with black ink.


The picture I used on the inside of the card.


I can never leave the back of the card ''naked''!  So to finish it off a overlapped a green and teal punched flower.  And because I love the stamp so much I used it again on the back!  It's so suiting!


So that's our Thank-you cards!  Hope you liked them!!

Be inspired...

Get Creative!

Saturday, 22 March 2008

My Wedding Bouquet

For our wedding I tried to come up with a different idea for the brides maids dresses.  And on the other hand, I couldn't decide on one colour either.  So I decided to go with a different colour for each brides maid.  The groomsmen would then each wear a coloured vest that would correspond to the girls dress that they would be standing with.

So I picked out a custom dress style from a shop owned by a good family friend.  She could make these dressed in an array of different colours as well as make matching full piece vests for the men.  We picked out 5 colours that were all very different but went nice together and then I just needed to tie the colours into my bouquet.

So we went with a base bouquet of a combination of whitish flowers and tried to pick a Gerber daisy to match each fabric.  We were able to find the pink, yellow and green Gerber daisies but the blue and purple were a bit tricky.  We finally went with a purpley blue poppy which was great because poppies have some what of an importance in our family.

The Finished Product

All in all I was and am delighted with how the bouquet and the dress colours worked out!


Be Inspired...

Get Creative!

Tuesday, 1 January 2008

Our Wedding Invites

Our wedding invitation adventure....

It was a long tedious venture but with the final product it was all worth it!

I had purchased the DIY kits from Micheal's

It Included:
- willow green scroll motif background card stock
- vellum inserts
- willow green ribbon
- willow green scroll motif card stock response cards
- invitation envelopes
- response card envelopes


I of course decided to make my life harder and wanted to print the invitation information on the vellum.  Three printer attempts later and we finally were able to use my Mom's portable printer if we individually feed through the vellum and layered each piece out to dry.  In hind sight, make sure you have a working laser printer on hand when you decide to print on vellum!


Once the info was printed we stamped with silver ink a scroll stamp beneath our names and added a silver double heart charm dangling from the ribbon.  The ribbon was feed through the pre punched holes in both the card stock and vellum.  Each end is feed through from front to the back and then pulled through from back to front through the opposite holes... sorry I don't have pictures to show this better, hope that makes sense.


The response cards we made into reception cards.  They were drastically easier to print on since they were card stock.  Once the printing was done we stamped them with the same scroll stamp but with willow green ink.

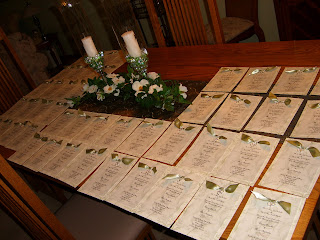
One hundred invites layed out on all the tables in my parents house.

An invite and reception card that I kept for my self and put into a shadow box.


Be Inspired...

Get Creative!