Friday 9 November 2012

Personalized Dishware

A few weeks ago I created some personalized dishes and mug sets as gifts for two of my closest friends.

Now just to give you some background; my girlfriend is, shall I say, a Tiffany fanatic and her husband... Is a geniuses when it comes to computers and frankly any type of technology. So I wanted to come with gifts for their birthdays that really said something about them. So I came up with designs for each of them which I incorporated onto plain white Dishware. And how did I portray these designs you ask? Well that's what this post is all about!

As I said before I found some nice quality plain white Dishware in a style that I liked.


On the computer, I used Word to design my templates where I used the technique described in my Painting Words post to mirror the text and images. I came up with several templates and I would share them, but I can't figure out how to upload a document for download. So if anyone would like to tackle this project and see my other templates leave a comment with your e-mail and I can send them to you.


The next step is a bit delicate... And of you are comfortable free handing it, you don't need to follow it. But I wanted a guideline as these dishes were gifts and I wanted them to look great.

So after each template is cut out, turn it over and use a slightly damp cloth to wet the paper. Once the lettering shows dark through the back of the paper you can place it on the dishware of choice and use you fingertip to firmly press along the design.  I taped my design in place so it did not move during this process.  Carefully peal away the paper and you will be left with a soft ink transfer of your design.


Dampened Design Template
Transferred Design


It took me a few times to get a dark enough transfer. So If your transfer does not come out right just wipe it off with a wet cloth and try again.

Once my designs were transferred to the Dishware I used permanent marker and carefully, I mean CAREFULLY, drew over the ink transfer.

If you make a mistake or are not happy with your final design, don't fret. Until you bake your Dishware the marker will come off with just a little scrubbing.

Finally once you are happy with your designs you simply bake your Dishware.

One blogger had a good tip in terms of baking temps and times. She recommended to set your oven to 350 degrees and place you dishware on the rack and let your oven pre-heat. Once pre-heated, bake for 30 minutes then turn your oven off.   Let cool completely before removing the pieces from the oven.


I did scrub the design after, and it was in fact permanent. But I would recommend to hand wash.

Viola, personalized dish sets! My friends both loved there's and I hope you give this easy project a try, either as a gift or just for you. There are endless possibilities.


Finished Products
My mustache model


Oh and here are the cards I made for each of them, both were also inspired by some pins on Pinterest.


Feminine Card
Masculine Card


And also the gifts all done up in the pretty boxes I picked up.


Patchwork box with pretty flowers
Rustic damask box with green bow


For my girlfriend I made up these adorable flowers out of cupcake liners and coffee filters... Sound interesting? More explanation to come... Keep an eye out for our next post!


Be inspired

Get Creative!


Saturday 6 October 2012

Colourful Play Keys

Hope everyone is enjoying their Thanksgiving long weekend.

I thought I'd brighten this gloomy day with this quick post about these super cute multi-coloured play keys.

Do you have a ton of odd keys laying in your junk drawer that you don't know what they open?

And do you have young kids who love to steel your actual keys to play with and usually end up setting your car alarm off or just loosing your keys all together... (I have been through this all to many times).

Well, I propose a solution that requires no expense and little work.


I was inspired about this idea from a pin on Pinterest. This example used nail polish in various coloures to colour code their existing keys. Also a geniuses idea!

So I thought why not paint the entire body of a key I don't need and make some fun play keys for my kids.

So that's what I did. I picked two set of complimenting nail polish colours (one boy version and one girl version) and I applied three coats on each side of each key.


And voila! A set of colourful keys for both my son and daughter.

Two tips:
- use wax paper to set the keys on while painting (I used plain paper the first time and it stuck to the nail polish and was a pain to get off)
- once the nail polish is dry you can scrap off any access to ensure the edges are smooth

Also I made these for my kids whom are old enough not to put them in their mouth. I am not sure how the nail polish will stand up or if it would chip.

And that's that! Hope you enjoyed this bright little post and I'm sure if you make these for your kids, they'll love them.


Be inspired,

Get Creative!


Sunday 16 September 2012

Painting Words

So I went to try this new technique I found on Pinterest to trace a printed word/name with a ball point pen on a desired object to give you an indented outline for painting.  Well when I attempted to do this with my kids names on their bedroom doors I realised, to my dismay, it would not work.  Firstly our panel doors with wood grain effect made it all too difficult to trace a straight line.  Secondly, these doors are so hard that no pen or pencil would make an indent.  My heart was set on painting these names directly on the doors... and since my free handing skills are good but not that good I had to think for a while of what I could do!

So I came up with an amazing solution!

Painted Name
 
I printed my kids names off Word in the desired size and font... but mirrored.  Then I placed the printed paper face down on  the door in the position I wanted it and rubbed along the letters as to act as a transfer.   It worked... surprisingly, and faintly left the ink from the letters on the paper, on the doors.

I then painted over these transferred names with the desired colour and done!

Doors Before
Doors After


Now this may sound all too easy.  Well once I figured out how to mirror the image with Word 2010, it was.  Sadly with Word 2010, my trusty old Wordart trick didn't work to flip the text in a mirrored position, and my printer doesn't have the automatic option.  So it took several different attempts of a few different techniques before I finally put a few ideas together and made it work!

You can flip Wordart by using the 3D Rotation tool found in the format shape option in the drop down menu, when you right click on your Wordart.  But for some reason it does not let you make Wordart larger then 72 pts, which was not big enough for what I wanted to achieve.

So I found another technique that I will use for much more computer projects now and for those of you who have this same problem here is how to make text on Word "Mirrored":

- type the name/word using the standard word cursor
- selected it
- click copy

The next step is the new trick I learnt:

- when you go to press paste; click the little down arrow underneath it and select "paste special"
- then from that pop up menu select "Picture (Enhanced Metafile)"

This action pastes the text you just copied as a picture. 
Now to rotate it to be Mirrored:

- right click the object and select "Format Picture"
- select 3D rotation
- then in the "X" row under the rotation subtitle enter 180 degrees
- click close and your name is now mirrored!


Here are the pictures off the process from start to finish for the "Painted Names" project.

Print Text in Mirrored Position Using an InkJet Printer

Tape Document Face Down in Desired Area

Ink Transfer Left Behind
Rub Along Text With Finger


Painted Word
Paint Over Letter Transfer


Apply Second Coat

Finished Name On Bedroom Door


And that was my Sunday afternoon project.  I am very thrilled with how the doors turned out!  I painted the names in the same colour as the hall way, which was Benjamin Moore's CC-570 (Night Train).  My best tips for anyone who would like try painting text is to take your time, relax and enjoy! 
 
 
Here is a quick note about another project I did this weekend.  I found these great one time use, "peel & stick" stencils at Dollarama.  So I put them to the test and added a little flare to my powder room.  It worked pretty simple.  They come on a roll so you just have to make sure it's level, smooth it on the wall as you unroll, paint and peel off.  It did bleed a bit, but it was uniform... and I kind of liked the effect.
 
Powder Room with Dash Border Stencil

 
Stencil Sample

Tuesday 4 September 2012

Bird House Gift Tags


Thought I would post a quick little post to share my new creation. I tried to think of something cute and different to use as gifts tags for a gift for my mother-in-law. I found inspiration from a stencil a had laying around and the bird house gift tags were born!


What I used:
- brown card stock
- patterned scrapbook paper in two colours
- pen
- scissors
- permanent maker
- roll on scrapbook tape


I first picked a set of coordinating scrapbook paper and paired them with a combination of two colours of brown card stock.

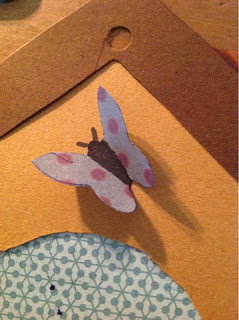
I traced the house part with he hole onto one piece of brown and the roof on the other brown colour. Then I traced the back piece on one of the patterned papers and the butterfly on the other.

I cut all the pieces out. I used a hole punch to start the opening of the main house piece so I could easily get in there with the scissors to cut the circle.

Individual Cut Pieces
Butterfly Piece Folded from Bottom Middle to Top Left Side of Body
Finished Butterfly


I then attached the pieces together. I first attached the back piece by rolling tape onto the back corners of the house piece.  Then the roof by taking the middle peace and the side about one inch in from the edges. Before I attached the butterfly I bent the wings from the middle of the bottom to the top corner on either side of the middle section. I then attached the butterfly by just the middle section. I used a marker to fill in the body of the butterfly and add antenna.

And those are my cute brid house gift tag creations!  The hole in the centre is where I wrote my "to" and "from" information.  So I do recomend to use a subtle tone on tone patterned paper in order to see your writting.


Finished Product
Shown on Two Garden Flowers from Each of my Kids for their Grandmother


Here is the template for this project.  Right click to save image and print it on plain paper as an 8 1/2 x 11 picture. 
Done this way, your bird house gift tag will beasure about 5 inches tall.


Friday 6 April 2012

Plush Nursery Mobile

Hope everyone is having a great Easter Long Weekend!  Just thought I would write another post about DIY Home Decor!

For today I am blogging about a mobile I made for my son's nursery.  It was made out of a plush ring stacker toy that I found to match an Elephant pillow that I received as a gift before he was born.  You may be wondering why I'm blogging about this 2 and a half  years later?  This is because I just took apart the mobile so my daughter could play with, but mainly because it was hanging in the kids bathroom and my son decided to start taking it apart for me!

Finished Mobile
What I Used:

- plush ring stacker toy with 5 rings (I found mine at Chapters)
- spool of 1 inch thick ribbon
- spool of 1/4 inch ribbon
- fabric scissors


So as I said I found the ring stacker toy at chapters and used this one specifically because it matched the elephant pillow that was my inspiration for the decor of the room.  I also love this toy because of all the different fabrics and textures, each ring also has a unique rattle inside which added sound to the mobile too.


Plush Ring Stacker 
Separated Rings

Before I got started with the assembly of the mobile, I first cut all the required ribbon pieces with fabric scissors in order to get a clean cut.  For the thick ribbon I used a chocolate brown satin with blue stitching.  With this, I cut an extra long piece for the top, I figured out the length so that the middle could attached to the ceiling and the ends would attach to two sides of the largest plush ring, which would make the mobile the perfect height for the crib.  Than I cut four pieces that gradually got smaller by about 2 inches.  And finally I cut eight equal pieces out of the thin ribbon, for this i used a lime green organza with a satin border. 
All these measurement took a bit of trial and error to get right.  But the final measurements I used worked out perfectly so here they are:

In the Thick Ribbon cut;
- one piece at 5 feet (48 inches) for the top
- one piece at 20 inches
- one piece at 18 inches
- one piece at 16 inches
- one piece at 14 inches

(these pieces will be tied in knots attaching to the thin ribbon)

In the Thin Ribbon cut;
- eight pieces at 12 inches each

 (these pieces will be tied around each ring allowing enough extra to finish off with a bow)

Thin Ribbon Lengths
Thick Ribbon Lengths


With the ribbon cut all that was left to do was assemble everything together.  I used the large ring as the top piece and I dangled the four smaller ones from there.  The thick (brown) ribbon made the support pieces of the mobile and the thin (green) ribbon was what attached the supporting pieces to the rings.  Here is how you can assemble the pieces together for your own mobile:

1. Tie one piece of green ribbon through the whole and around one side of each of the four smaller rings making it so that the bow is at the front of one flat side. 

2. With the large ring tie four pieces of the green ribbon through the middle and around each side (so that there are four bows around the outside round part at north, south, east and west of the ring).

3. Fold the extra long piece of brown ribbon in half and tie each end with a tight knot to one green ribbon piece that is tied around the largest ring and then another piece across from the first, these knots should sit at the top flat section of the ring. 

4. Tie the remaining pieces of thick ribbon to each of the four green ribbon pieces attached to the same ring so that the knots are positioned at the bottom flat section of the ring.

5. Randomly tie the lose ends of the brown ribbon to each of the green ribbon pieces attached to the remaining four rings.  These knots should be positioned on one side of the round section of each ring.


Finished Mobile
Mobile Hung Above Crib


The end result should be, and was in my case, a mobile with a large ring hung horizontally at the top and four smaller rings randomly dangling vertically at varying lengths.  The different rattle sounds that were inside the rings made a cute sound when the mobile would swing and my son as a baby loved watching the rings gently sway. 

This mobile was perfect for this nursery and helped to tie together the surrounding decor, especially the matching elephant pillow.  On the opposite wall to the crib was a elephant silhouette mural.  To see pictures of the rest of the room check out my facebook page and view the Nursery Project album.

Hope you enjoyed this fun little project!


Be Inspired...

Get Creative!

Wednesday 28 March 2012

Family Wall Art

Hi everyone!  It's been a little while since I blogged about Creativity...  so I thought I would tell you about my latest DIY art project for our Mudroom!  Check out all of our Mudroom Makeover pictures in the album on my Facebook page.  Mudrooms are the perfect place to have a bit of fun with colour and art.  It's not a focal room of the house and usually it is just a room for the family.  For our mudroom we painted the walls in Benjamin Moore's Cedar Green which is a wonderfully lively colour that is very energetic and welcoming.  It really added a great feel to the room and our entire family love walking through it every time we enter and exit the house!

Since it is, as I said a room solely for the family I wanted to add an extra special touch that would really add a homey feel and could really be a memorable part of the house.  So I put my talented family to work at what they love to do so much (Hubby too but he wasn't too thrilled about the mess) and we made some great art from hand and foot prints!


Finished Product


What we used:
- brown craft paper cut into 12" by 12" squares
- white acrylic paint (I just used whatever white paint I had lying around)
- leftover wall paint (Cedar Green Colour)
- square shadow frames from IKEA (I used white for these but you can get them in several finishes)
- paper plates
- paint brush

Supplies

With all our supplies ready to go Oliver and I started at the painting.  We had to do the "mom" and "dad's" squares in stages as I wanted to overlap them with the kids hand prints too.

I assisted Oliver with doing his hands upside down with his thumbs and index fingers touching so that the space between his hands made a heart.  We practised this style of hand prints while making Cards for Valentine's Day.

I then printed Opal's foot prints with her heals touching so that it also reflected the shape of a heart.

Just for fun I printed each of our two dogs and cats paws but I didn't end up framing them.

Oliver's Hand prints and Opal's Footprints

Spudnick, Apple and Pickles Paw Prints

Aaron and I then painted our own hands and made white hand prints on the last two squares.  It took some arm twisting to get Aaron to paint (he doesn't like being crafty!) but I eventually got him to join in.

Daddy and Son, Mommy and Daughter

Once all the white paint was dry we went and did the second faze of our art.  We used the left over wall paint in Cedar Green to create a layered look.  We printed Oliver's hand on top of Aaron's and Opals hand print on top of mine (it is still super hard to print an infants hand).  Then on the kids art pieces I added some of the green paint by painting a heart in the space in between Oliver's hands and painted a outline of a heart around Opals Footprints.

Oliver and Opals Heart Inspired Prints

That was the extent of our painting for this project, not a lot but just enough to have some fun.  It is extremely fun to do hand and foot prints with the kids and this time it included the whole family which was great.  I think our art turned out awesome!

All of our finished art before getting framed.

Then when all the paint was dry I went ahead and framed the individual pieces of art.  I bought shadow box frames from Ikea in white so that they accented the white prints.  I traced the glass onto the brown paper to trim the art to the perfect size for the frame.  I Cleaned the glass until it was spotless and shiny with my Norwex cloths (love them!!). 

Framing supplies

Finally I put them together and they were ready to hang.  We hung them evenly spaced across the wall from the corner of the room to the edge of the cabinet.  We also hung them only about 9 inches from the ceiling.  I wanted them to stand out but also wanted to leave room for some hooks and coats.  The result actually made the room feel really tall and spacious!  I also had room to add a rub on wall quote that perfectly finished off the whole family focal wall.

Finished Product Hung on the Wall
Finished Wall

All in all this was a really fun project that I will always have to cherish.  It was the perfect touch for this family space and I love the way the overlapping colours add texture to the bright wall colour!  I hope you enjoyed this fun little post.  You could do this project in many different colours and also by stamping many other shaped items instead of hand/foot prints.  You can even try using cookie cutters for a inverted version!  There is so much you could do with just brown paper, paint, and a classic frame... just have fun with it!

Be Inspired...

Get Creative!